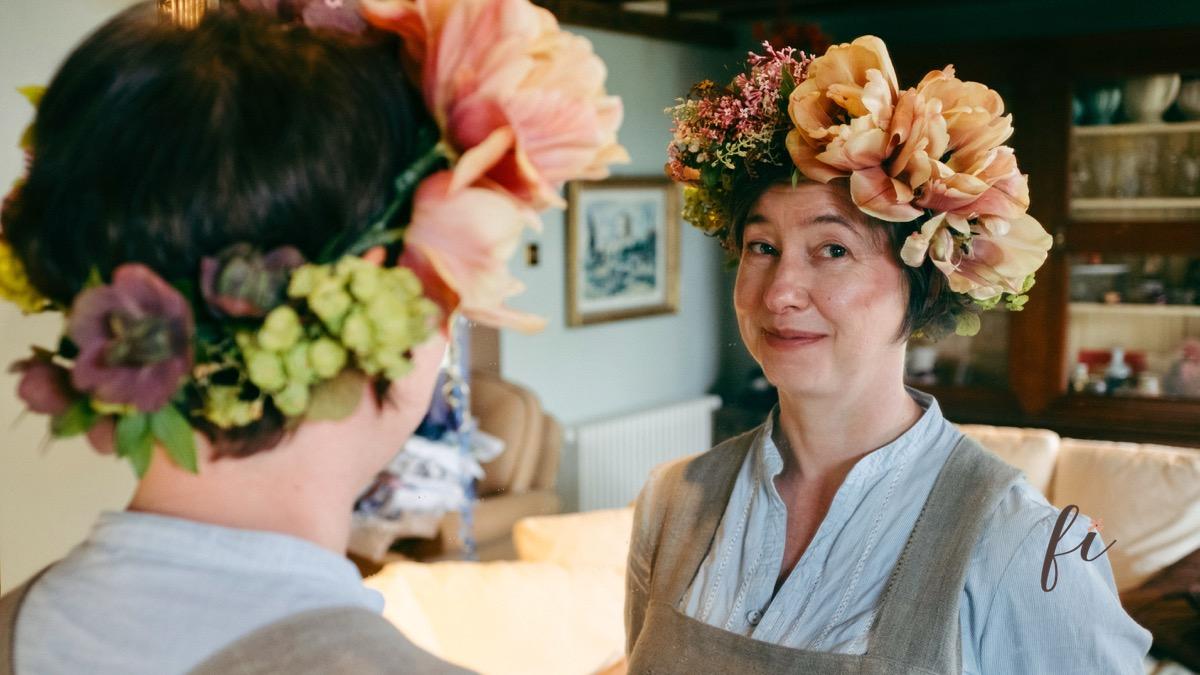
The trend for floral crowns show no sign of abating. I simply adore them.
Having fallen for la belle époque tulips when I grew them for the first time last year naturally I planted more, never fearing the old adage that you can have too much of a good thing. I decided a spring floral crown made of La Belle Epoque tulips would be just the most perfect thing. These beautiful tulips’ French name translates to mean “the beautiful era”, a time of optimism, peace and prosperity. What’s not to love about that.
I am still in love with the wild garden style of floral design and have used seasonal components in my floral crown cut from my garden to complement the tulips. I created bunches of hellebores, pieris, euphorbia and spirea. Their form added both movement space” so the end result is not too dense, and it looks like the flowers are almost growing still from your spring floral crown.
There are of course numerous way to make the base of your floral crown, depending on the materials you plan to include in your design. I used florists wire and sized it to fit my head exactly. Needless say, it is really important to ensure the crown fits as it ends up being surprisingly heavy. Take care to ensure there are no wires poking out as you don’t want anything digging into your head. I cover my wires in florist tape to make sure all is safe and secure. Use pliers as you need something strong to twist the wires together securely.
A spring floral crown can be made with so many different types of flowers and foliage but if you are going to add larger pieces, you’ll need to wire them properly to ensure they are secured robustly to your head. There would be nothing worse than it all dropping off! If all your components are small, then it is easier to place the florals than if you have large blooms.
Another critical step is to condition the flowers really well, as once you’ve added them, their access to water is gone. You can give them a misted spray to keep them fresh but this won’t provide the same hydration as sitting directly in water obviouly.
I arrange bunches of individually wired stems at various angles to avoid that soldiers all in a row look.
Place your flowers on the outside of the crown, as otherwise you’ll be crushing your material when you put in on your head. I arrange bunches of individually wired stems at various angles to avoid that soldiers all in a row look. I want this to look like a glorious wild garden style design.
Never underestimate the amount of material or the time it takes to wire. It can be a bit fiddly so patience is required. I find using a fine gauge wire is best to attach your wire to the stem. This means you end up with a thin wire stem to group the components together and it avoids creating a thick bulky group of materials. In truth reader in making this crown, I think I have discovered I need glasses finally!
I left a gap at the back of my crown – in all honestly it was because I had used all my flowers and foliage but this was a serndipitous error that I would repeat. Leaving a gap in the floral crown ensures that you have somewhere to hold the crown without risking crushing everything.
Wear your floral crown with seasonal pride my floral friends, and for those of you looking for wedding flowers ideas – this would make the perfect spring bridal crown for those brides seeking out a rustic or wild floral look.
Join me for a few minutes of on-screen floral curation on fierceTV and see how I have created this wild garden style spring floral crown.
Read more from Fierceblooms, this flower grower and Cheshire florist on the floristry blog.
Also on the site, there are loads more articles about my canalside cutting garden and a page detailing my fierce flower classes and tutelage for you to enrol on a learn to make bouquets like this.